Sunday, December 13, 2009

Tomato Cage Trees

Every year at Thanksgiving my mom, sisters, aunt and I do a craft. This year we did tomato cage trees. My sister's ward did them as a craft and we loved the idea. So here's how we made ours...

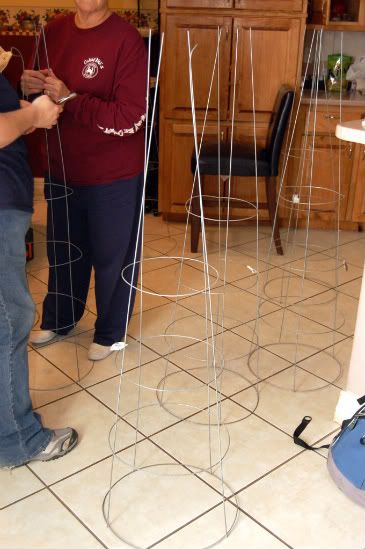
Start with tomato cages. I bought all of these at home depot for about $2.80 each. They were the larger 4 tier ones.

Photobucket

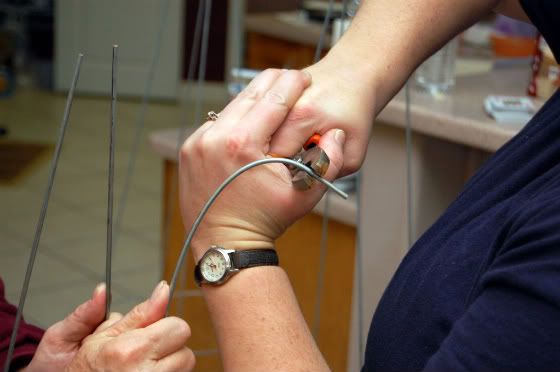
Then we started by bending down the points. This was a team effort. The purpose for this was to give a place on top of the tree to add the bow. It would just sit in the middle of the bent wire.

Photobucket

Then we found some garland at wal mart $4 for 9 ft. Later I found some for $2 for 9ft but it wasn't as thick. I bought it later and used and it worked fine though.

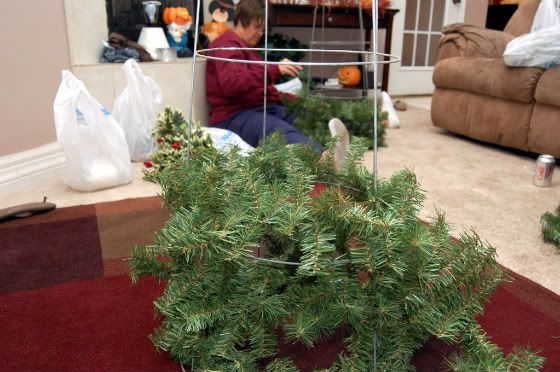
Start at the bottom and work your way up. We wrapped the garland around the outside of the straight sides and then every once in a while wrapped it around the round layers to hold it in place. Once you get to the top you can just cut the excess garland off with wire cutters.

Photobucket


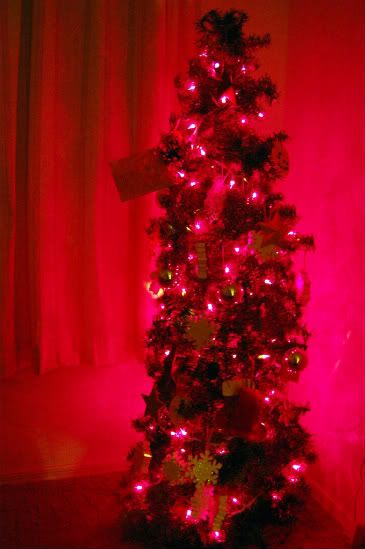
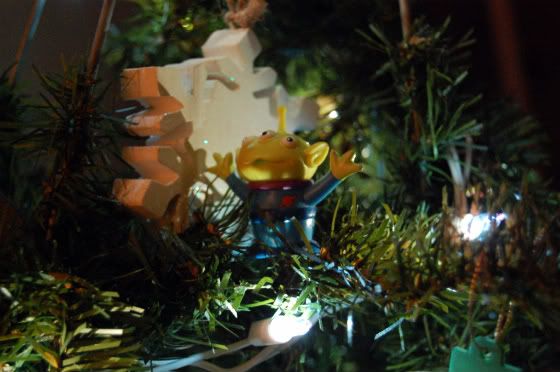
They work perfect in kids rooms. As soon as we got home the kids each picked a tree and took it in their rooms to decorate. A strand of 100 lights filled the trees perfectly. I had other ideas for the trees but the kids were so excited about them that I just let them have them and decorate them how they wish. I had bought some pretty Christmas ribbon for a bow, some berry garland and red beaded garland but oh well.

Sorry for the bad photos.

A purple one for Sydney...

Photobucket

and blue lights for Theron. Seriously, how cute is this...

Photobucket


Photobucket

I think the total cost per tree was about $12 including the lights!

Friday, December 4, 2009

Awesome giveaway!

Totally want to win THIS! Check it out!

1. What 5 items are on your holiday wish list this year? cricut, pots &pans, wheat grinder, camera strap

2. What is your favorite handmade gift you have received? hand made ornaments from my son

3. What handmade gift have you always wanted to tackle? a quilt, the binding is scary.

4. What was the best Christmas gift you received as a child? my cabbage patch kid, I was sooo excited!

5. What items are on your kid’s wish list this year?scooters, leapsters and anything princess and star wars

6. What is your favorite holiday food? easy, mom's yams

7. What will you be hand-crafting for the holidays? necklaces

8. What is your favorite holiday movie? White Christmas & Miracle on 34th street

9. Favorite holiday song? All I want for Christmas is you

10. Favorite holiday pastime?
Our Annual Family Xmas party

Thursday, November 5, 2009

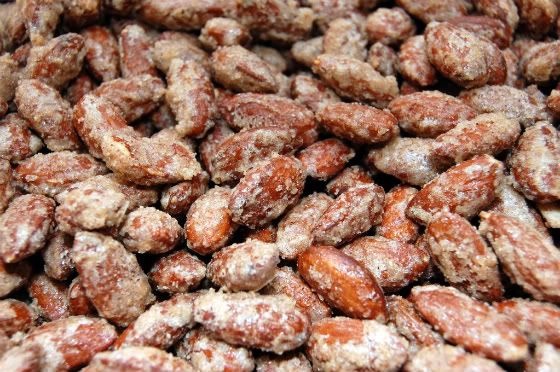
Cinnamon Roasted Almonds

I'm really sorry to anyone that checks my blog. I have been wanting to post for days now. If I'm blogging it's usually on my personal blog and even then that has slowed down. Child 1 had the swine flu and I can't get my husband healthy. He is going on 2 weeks of feeling awful. Urgh!

However I will post this awesome recipe for cinnamon roasted almonds. These are really really good!

Photobucket


Ingredients:

1 teaspoon cold water
1 egg white
4 cups whole almonds
1/4 teaspoon salt
1/2 teaspoon ground cinnamon
1/2 cup white sugar

preheat oven to 250 and grease a cookie sheet. Preferably one with edges.
Mix the egg and water until egg becomes frothy. Add the nuts and mix it around until the nuts are coated with the egg. Mix together the sugar salt and cinnamon and then sprinkle it over the nuts. Toss until nuts are evenly coated. Spread into the greased pan and bake for 1 hour. I stirred mine every 20 minutes or so.

Tip: I think the nuts are a lot better once they're cooled. They're good warm but I liked them after they've cooled so the nuts aren't so soft.

Store in a air tight container.

Tuesday, October 6, 2009

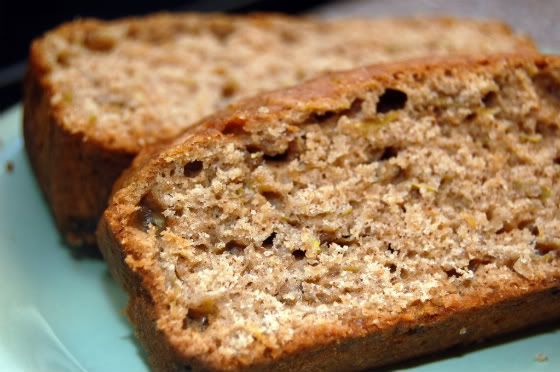
Zucchini Bread

Photobucket

This recipe is amazing. Really it is! It's really moist, fluffy and filling. I don't think I'll ever use another recipe for plain ol' zucchini bread. Sooo good! I found it online and changed it a little to cut out some sugar. Here's the recipe...

3 C flour
1 tsp. salt
1 tsp. baking soda
1 tsp. baking powder
3 tsp cinnamon
3 eggs
1/2 C olive oil
1/2 C applesauce
1/2 C white sugar
1 C brown sugar
3 tsp vanilla
3-4 C grated or chopped zucchini. I actually used close to 5 cups.

preheat oven to 325.
sift flour, salt, baking powder, baking soda & cinnamon together.

In separate bowl, beat eggs, oil, vanilla, applesauce & sugar. Add sifted ingredients. Mix well. Add zucchini. Bake in 2 greased pans 50-55 minutes. I think mine were done in about 60 min.

Tip: some recipes for zucchini bread say to squeeze all the water out of the zucchini after it has been grated. Don't do that for this recipe. All the water in the zucchini is what helps keep the bread so moist and keeps it from drying out.

If you're looking for a different zucchini bread recipe try this.

Thursday, October 1, 2009

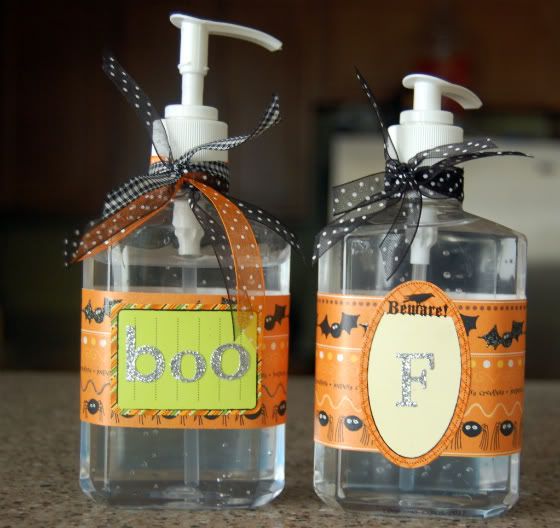
Here's a way to [Re]beautify something, give a fun gift and help keep kids germ free during this flu season. O.k. there is no such thing as a kid ever being germ free but you know what I mean.

These are going to Theron's teacher...

Photobucket

The funny thing is that This popped up on my google reader this morning. No way! Someone was totally on the same wave length or something. We have to be friends. I need to meet her! Our projects look way to much a like for us not to be friends. How cool is this?

Friday, September 25, 2009

Easy home made potpourri

Photobucket
This stuff will make your whole entire house smell soooo good. So good, you might just start licking your walls.

Here's what you need:

  • 1 lemon
  • 1 orange
  • 3-3 inch cinnamon sticks
  • 6 bay leaves
  • ½ cup whole cloves
Combine all ingredients in a pan with water and simmer on low all day. Keep filling with water as needed.

One of my favorite things about this time of year is all the yummy smells. The cinnamon, vanilla, sugar cookies, fall, pumpkin, spice, fire places, hot chocolate, thanksgiving turkeys, Christmas trees. All of it. I love it! This is the perfect scent to welcome fall. Even though it's still in the upper 90's here, I'm doing everything I can to make it feel like the summer weather is almost over.

Thanks Jackie Lee and Stacey for the recipe!

Wednesday, September 2, 2009

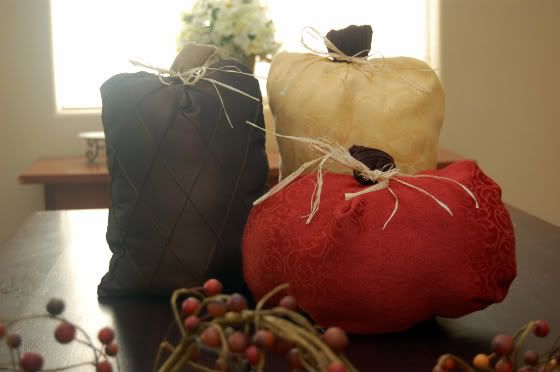
Last fall I was busy with my enrichment calling and other things. I didn't get anything done that I wanted to. So, this year I'm starting early, to make up for lost time. First off, pumpkins...

Photobucket

Go here for the tutorial. Holly is so cute and creative. In fact go to her blog anyways so you can see how the pumpkins are supposed to look. Good thing I was going for the homemade look and not perfection. Mine turned out so ugly they're cute.

Wednesday, August 19, 2009

Hooded Towel

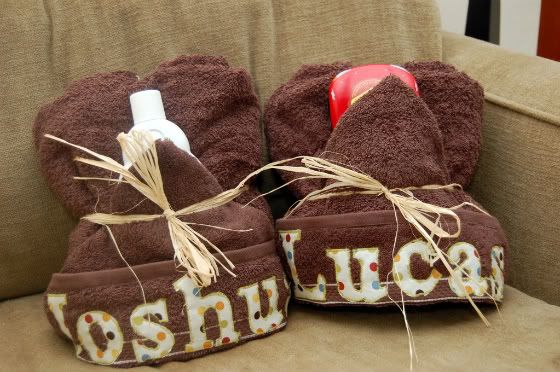
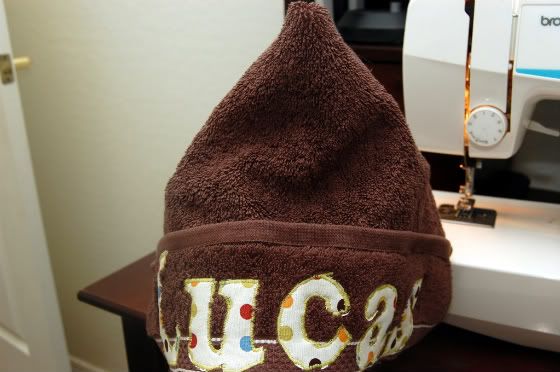
Hooded Towel Tutorial. Grab a full sized towel and a hand towel and [re]beautify it.

Photobucket


I'm leaving for the weekend and I should be packing and getting ready to go but I'm not. I'm sitting here on my big rear typing away & stressing about everything that still needs to be done. I'm excited about this tutorial though.

Here's how I did it...thanks to my friend Beth.

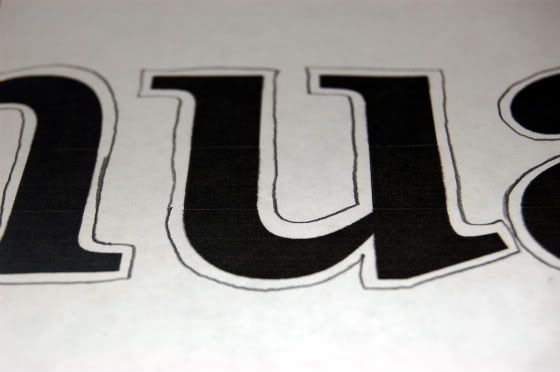
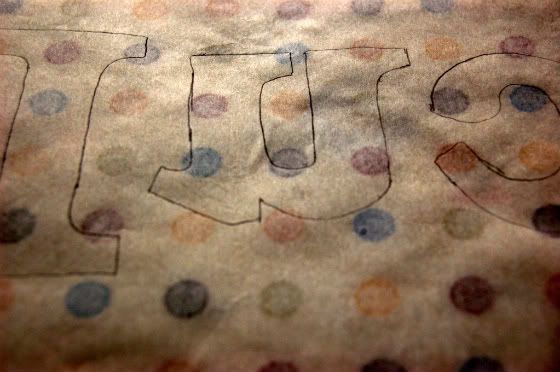
Start with a font you like and enlarge it to the size you want. I chose this font but it wasn't thick enough so I printed it and then drew an outer line to make it even thicker. Cut out your letters

Photobucket


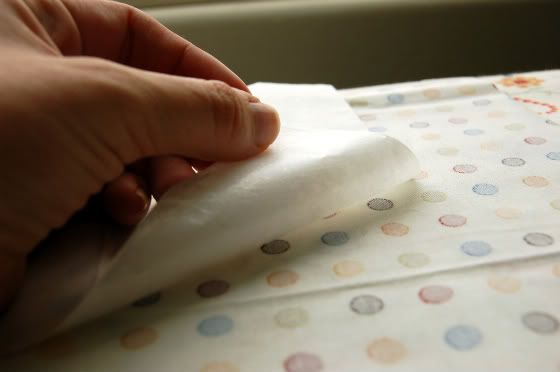
Then I got some iron on adhesive. The one I used was Heat N Bond but there are others like Wonder Under. Make sure you get the one that allows you to sew after it's been applied. Next you're going to adhere your fabric to the heat n bond. Place together the bumpy side of the heat n bond and the wrong side of your fabric. Iron over it until it's stuck to the fabric. Here's a picture, bumpy side of adhesive and wrong side of fabric...

Photobucket

Next, you take your cut out letters and trace them backwards on the other side of your heat n bond. This way, you letters come out facing the right way. You'll see what I mean in the next step. So, trace your letters backwards on the paper side of the heat n bond and then cut them out again.

Photobucket

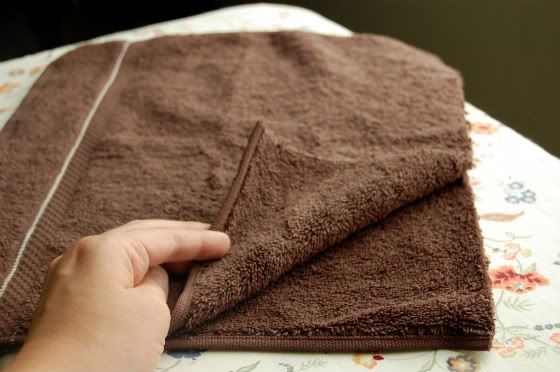
Next, get a hand towel that matches the towel you'll be using. Cut the hand towel in half.

Photobucket

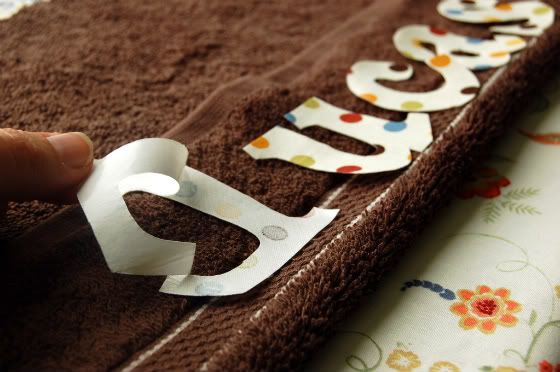
Now, fold up the end of your (half hand towel) towel so that the letters will fit. This is where the letters will be sewn so make sure you give them enough room. Space them out and remove the paper side of the heat n bond. If you look you'll see there will be a shiny residue on your fabric and this is what will make your fabric stick to your towel so you can stitch it on there. Remove the paper and lay the letters back down on the towel...

Photobucket

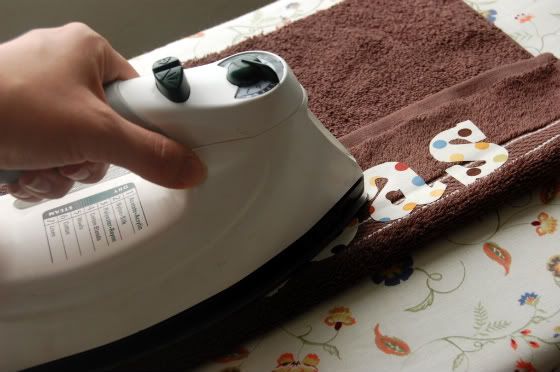
and then iron those bad boys on there.

Photobucket

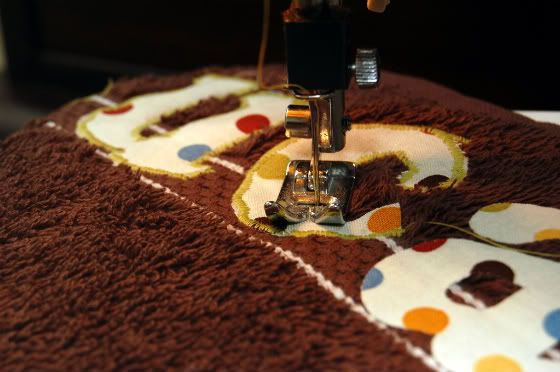
then you're going to stitch the letter to the towel. The zig zag stitch is probably the easiest to use, I think. Don't look to closely at my stitching, my poor old ancient machine has been giving me heck. My pedal has started sticking so my stitching gets a little crazy. Before you start stitching, make sure you unfold your towel. You don't want to stitch it folded yet. Stitch all your letters on!

Photobucket

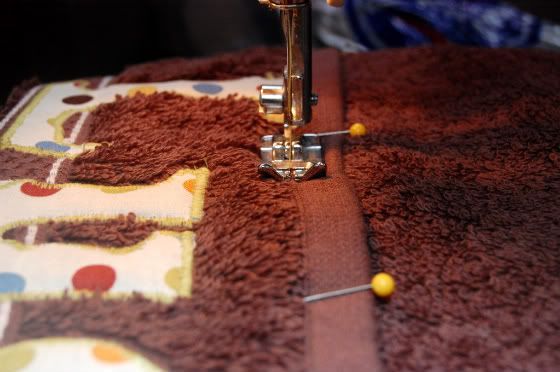
Once all the letters are stitched on, then fold your towel back on the line and pin. Then stitch along the top of the letters like the photo. Don't worry about stitching straight. You won't even see your thread once you're done.

Photobucket

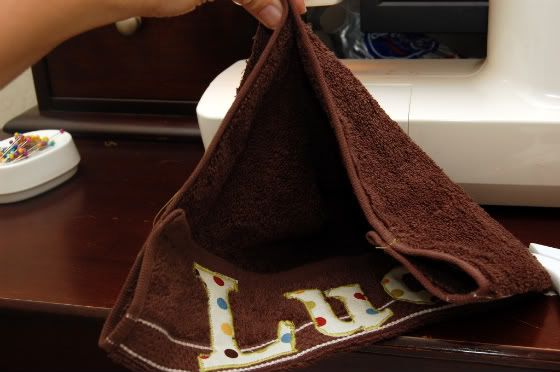
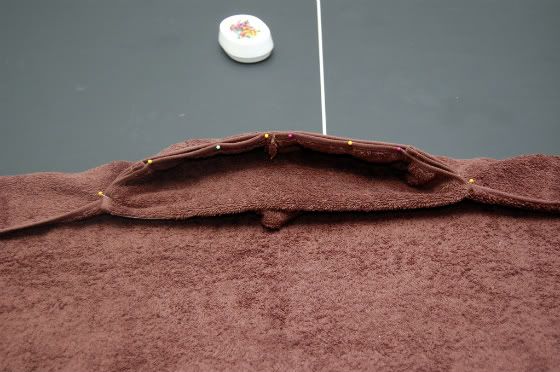
You're almost done with the hood of the towel. Now take your towel and fold it with the letters on the inside like so. You're going to stitch the top of the hood. Pin along the top and sew straight across.

Photobucket

Here's another photo. See the pins on the top? The letters are also on the inside of the fold. Stitch right across the top.

Photobucket

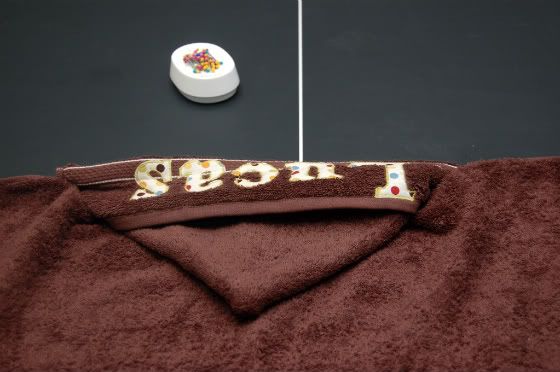
Remove the pins and fold the towel right side out. You made the hood. There is only one more step. You just have to attach it to the towel.
Photobucket

Okay, take your full sized towel and fold it in half. Pay attention to the half way point of the towel because that is where you're going to line up the hood. You want to attach the hood in the center of the towel. Put a pin or something there to mark it. Then take your hood and line up the center of the back bottom of the hood to the pin that marks the center of the towel. You'll line them up with the letters on the hood facing up. Pin it so it will stay in place while you stitch. Your machine will be sewing through a few layers of towel so it will be thick.

Photobucket

Here's another photo...

Photobucket

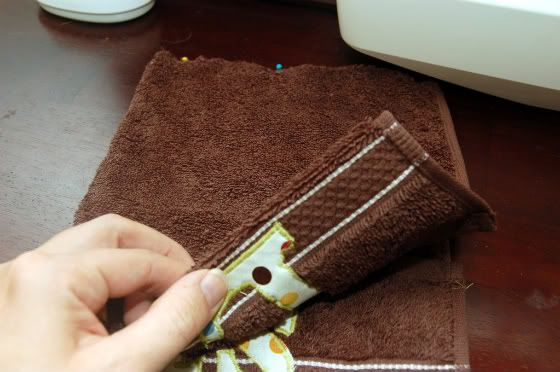
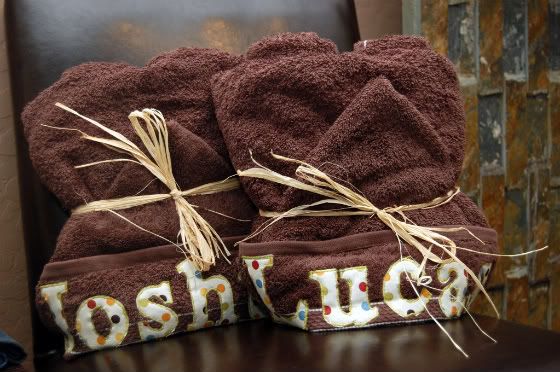
Of course I forgot to take a photo of the towel all done and unfolded so you could see it. I did however take a photo of how I like to fold them after they're finished. I made 2 towels. I bought 2 full sized towels and one hand towel. I just used the other half of the hand towel after it was cut for the other hood. I also buy all my towels at target when they go on clearance. I stock up.

Photobucket

They also look cute with a bottle of bubble bath tucked in there too!

Photobucket


There might seem to be a lot of steps and I hope I didn't make it too confusing. They're actually really easy. let me know if you have any questions or if I need to explain a little more. Go make one and send me pics. I'd love to see your creations!

Also, I took some good advice from Beth. I made a towel for my 10 year old niece too. Since she was so tall the hooded towel wouldn't really fit right. Her bum probably would have hung out the bottom. So, when I made hers I just put her name at the end of the towel instead of making a hood for it. Still so cute!

p.s. are you as excited as I am to get those picture of my toilet off the top of my blog?
Sunday, August 16, 2009

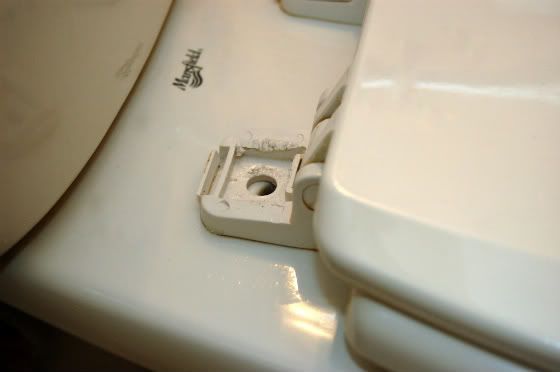
If your toilet seat become loose, do you know how to fix it? I had no idea. After watching a plumber come and fix it for me and look at me like I'm stupid for not knowing how to fix something so easy, I learned. I'm going to spare you the embarrassment and share how to fix it. I'm convinced that after fixing things in the home all by yourself you should be called "queen of the castle".
You pop off the plastic cover to the thing on the back of your seat. I never even knew these things came off. I took the screw out in this photo because I was cleaning it off. Apparently it is a major trap for pee from a 5 year old that has a really bad aim. Gross! Just pop off the plastic cover so you can see the screw head.

Photobucket
(sorry, I didn't get it as clean as I wanted for the photo, and I scraped the crap out of it as I didn't realize there was a nut on the underside so I was trying to pop it out insetaed of unscrewing it. oh well!)

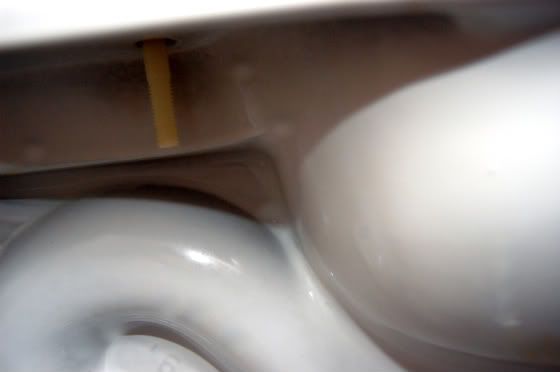
Then reach around the underside of the toilet and there will be the bottom half of the screw hanging down with a nut attached. I didn't realize in this photo my nut is missing because I took it off and didn't put it back on before I took the photo but there will be one there. (there was pee on the underside of the screw too) Just grab the nut and hold it tight while tightening the top part of the screw with a screwdriver.

Photobucket

Who knew it could be so easy? I'll be removing mine regularly for cleaning.

I'll post more about becoming the "queen of my castle". I have a feeling I will have to learn more as Ben will be gone a lot this year for rotations and I'll be on my own for repairs. This could get ugly!

Thursday, August 13, 2009

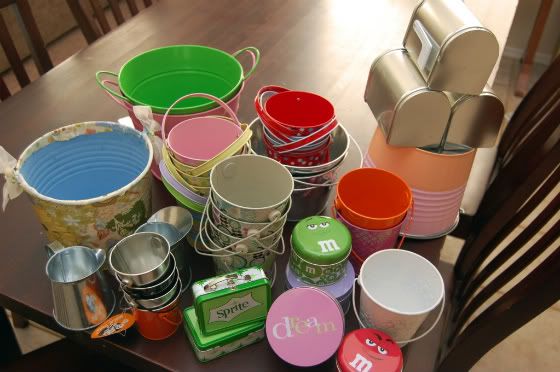
I promise I am almost done with my bucket posts. I just needed to get on here and publicly thank my sister Tifani for her help. You see she helped me realize that I have an addiction. I really didn't know it was there, but it is. I had never really thought bout the way I feel when I get near my weakness. Something comes over me and I give in without even hesitating or even thinking about it. I am working on trying to fix it and I'm not sure there is a rehab for my sickness...

I am addicted to buckets.

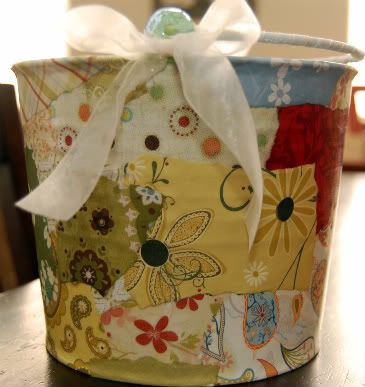
Photobucket


Now that I think about it. Every single one of these were purchased at Target in the dollar spot. Go and get some, before I do.

Saturday, August 8, 2009

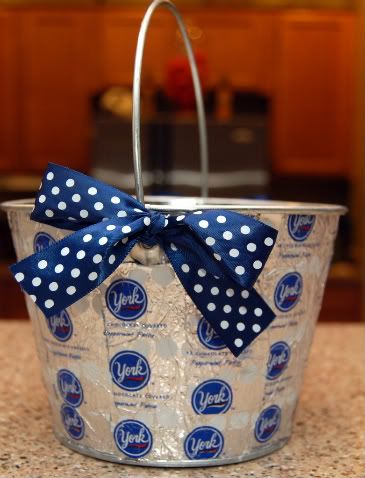
Here's a couple more ideas for the candy buckets

York peppermint patties

Photobucket
scraps of paper torn...
Photobucket
hershey's hugs...
Photobucket

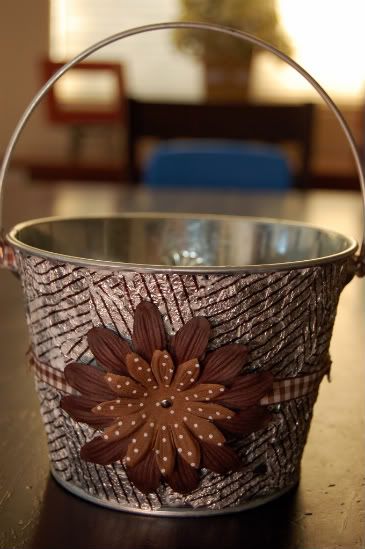
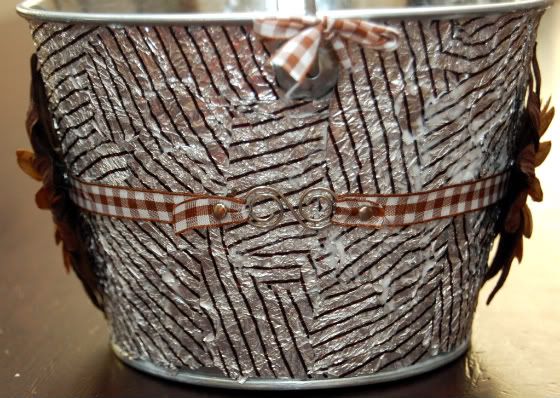
This hugs bucket was kind of a pain. The wrappers took longer to get off and they tore really easily. I had planned on making a design with the lines on the wrappers but since most of them tore, they just got slapped on there every which way. I thought it still worked because the flowers and ribbon with the embellishments don't make the lined stand out too bad. I think the bucket should have been spry painted brown first though. Maybe I'll just try to paint the handle or add brown ribbon. We'll see.

Photobucket


Alright you crafty people, grab a bucket and [re]beautify it... and then send me pics. I'd love to see them!
shamoms[at]cox[dot]net

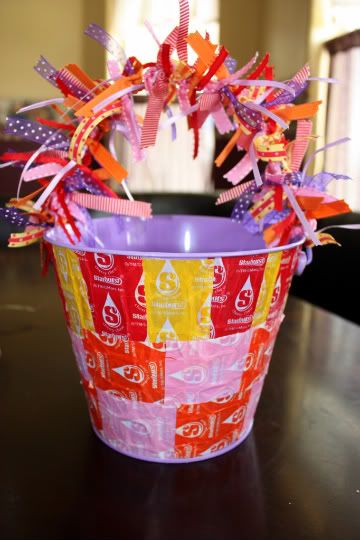
My super cute sister Tiff made a starburst bucket. So fun!

Photobucket

Saturday, August 1, 2009

A gift of memories

Photobucket

This is my most favorite gift I have ever given.
This is about the time year last year when I started to put this together. You see, for Christmas last year I asked my 4 siblings if they could send me photos of them and their families. Photos from the entire year of 2008. It was quite the task so I wanted them to have plenty of time to look through their photos and choose ones that they wanted. After they sent me all their photos I put them together (with the help of my husband) with music and made a video for my mom and dad.

It was so fun to see the end result. It took quite a bit of time because it was my first video but Ben is a pro and showed the ropes and gave me a few pointers. I just used some software that Ben had on our computer. I think it's Pinnacle. I know there are a ton of versions out there but I'm pretty sure it's this one we have. Our version is old because he's used it for a long time.

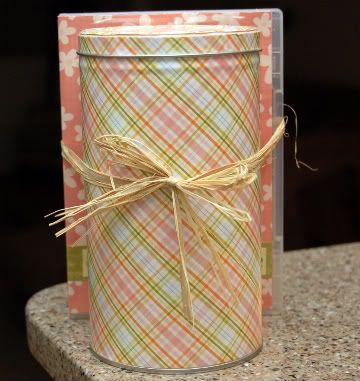
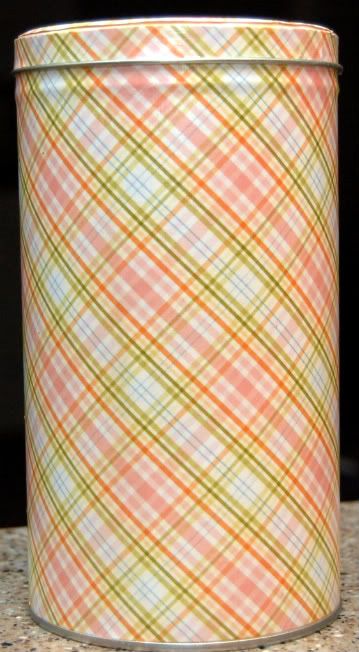
I thought that the perfect gift needed the perfect wrapping so this is what I came up with. I decoupaged a can from the Pepperidge Farm cookies. I can't remember the name of the cookies but it's a tall can. The cookies are shaped like sticks. Someone help me out, this is going to drive me crazy...what are they called? Oh dear!

Photobucket

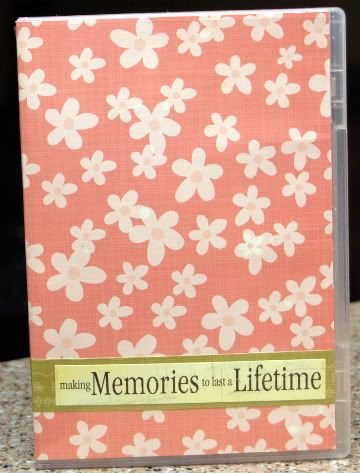
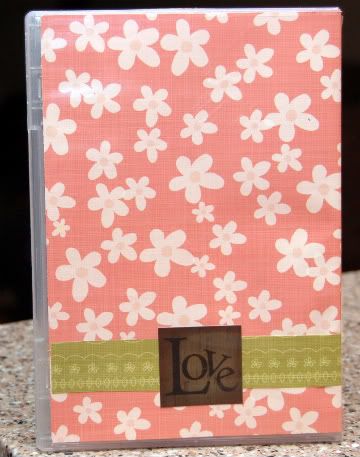
Then I cut some scrapbook paper to fit inside the sleeve of a dvd case we had. You can find some like it here .
Front of case...
Photobucket
back of case...
Photobucket

You could be really creative with how you decorated the case. My mom is more simple so I didn't do too much to hers. You could decorate it for the season or just something to match the decore of the home. Inside the can I filled it with goodies to eat while watching the movie.

I ended up making copies of the video for my siblings and a few other family members. It's such a fun thing to sit and watch. It's amazing to watch it now and see how much all the kids have changed in just a years time. I would love it if I got a gift like this...hint hint Benji.

I didn't worry too much about the length of the movie so it's pretty long. I knew there was a lot of photos to fit in there & it ended up being about an hour or so long. I just had to find enough songs to match the amount of pictures.

It's so fun to make it personal and include inside jokes and things only my family would know. Here's the video...

2008 Family Moments from Ruprick on Vimeo.

Wednesday, July 29, 2009

Sydney helped me draw a winner today. At first she drew this number from the bucket. Sorry it's blurry...

Photobucket

but #7 was a comment from my sarcastic husband. In case you're wondering why his photo ID is the Hoff, here's why. I think he secretly wishes he was the Hoff. Ha!

Photobucket

Sorry honey, you're not allowed to win. You can share our bucket with the kids.

So Sydney drew another number and she drew Buscando la Luz.

Photobucket

I just happen to know this cool girl and I'm excited to give it to her!! Woo Hoo!

Thanks everyone for the nice comments, you all made my day.
I'll be posting another idea soon. It's my absolute favorite, most meaningful, funnest gift to give.

Monday, July 20, 2009

Crazy Candy Wrapper Buckets

[Giveaway Closed, Thanks everyone!]

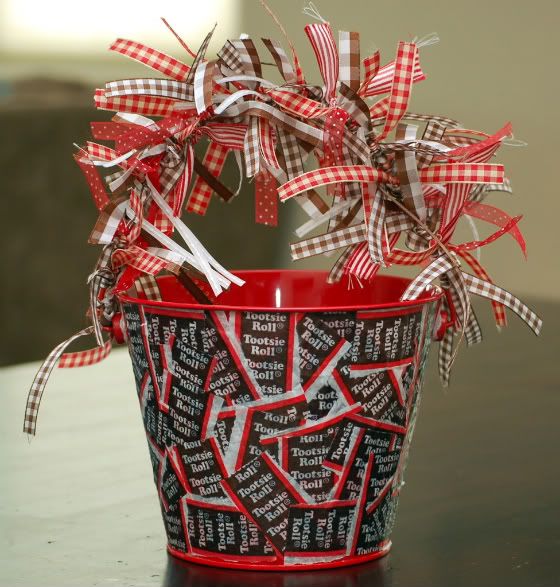
The kids needed a new bucket for their crayons. The old plastic Willy Wonka lunch bucket from Sea World could only hold up so much longer. I wanted something fun and different. I [re]cycled tootsie roll wrappers, this is what I came up with...

Photobucket

I love how crazy it turned out. I was going to do a tutorial but I forgot to take pictures as I did it. It's o.k. though, you can make one too, it was sooo easy. You'll need:

a bucket (any size)
brush
mod podge
candy wrappers (enough to cover the bucket)

My bucket was from the dollar spot at Target. I just unwrapped all the candy and then tore the ends of the wrapper off. Then, brushed on some mod podge, big enough to hold a wrapper. Applied a little more and added another wrapper. Work your way all the way around the bucket overlapping wrappers until it's all covered. Then apply one or two more coats of mod podge and let it dry.

Then I double knotted ribbon around the handle. I think I used 7 different kinds of ribbon. So fun. Be creative, you could use a fun bucket like this for anything.

*put the unwrapped candy back in the bucket as a party favor or table setting at a shower or party.
*holding hair ribbons or bows
*a perfect bucket to hold a small gift for a friend


My sister made one with starbust candy and it was cute as well. Tiff send me a picture of your finished product.

If you like this super fun bucket, you're in luck because I made an extra one. (made from tootsie roll wrappers but it still looks a little different) Leave me a comment and I'll have the kids draw one lucky winner Wed, July 29!

Friday, July 3, 2009

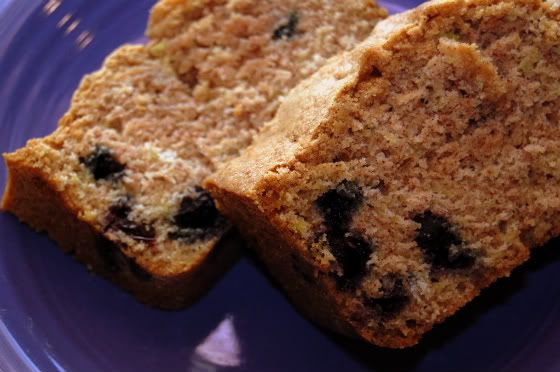
Zucchini Blueberry Bread

Are you ready for this? No really, are you ready for this.

Photobucket
I got his recipe from my friend Melanie...

Blueberry
Zucchini Bread
3 eggs
1 c. oil
2 c. sugar
2 c. zucchini (grated)
3 tsp. vanilla

Beat egg until foamy. Add oil, sugar, vanilla, and zucchini.

Then add:
3 c. flour
1 tsp. salt
1 tsp. soda
1 tsp. baking powder
3 tsp. cinnamon
dash nutmeg
Sift together and add to egg mixture.

Add:
1 c. blueberries
1/2 c. nuts (optional)

Bake in greased and floured bread pans at 325 degrees for 50 minutes to an hour until a knife inserted in the center comes out clean. Makes two loaves.

Saturday, June 27, 2009

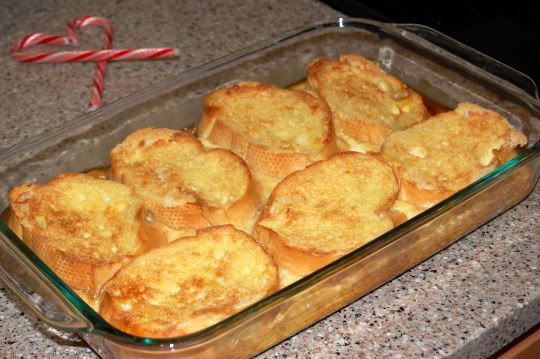
Creme Brulee French Toast

Ben loves this recipe. His birthday is coming up next Saturday and I plan on making this for him for breakfast on his special day. I thought I'd share the recipe since it's amazing and easy.
I love that all the prep is done the night before and then refrigerated until the next morning. I'm pretty sure this recipe is pretty popular but just in case there is someone out there who hasn't tried it...you have to.

Anyways, here's the recipe...

Photobucket


Creme Brulee French Toast
INGREDIENTS
• 1 stick (1/2 cup) unsalted butter
• 1 cup packed brown sugar
• 2 tablespoons corn syrup
• An 8- to 9-inch round loaf country-style bread
• 5 large eggs
• 1 1/2 cups half-and-half
• 1 teaspoon vanilla
• 1 teaspoon Grand Marnier or Orange Juice
• 1/4 teaspoon salt

DIRECTIONS

In a small heavy saucepan melt butter with brown sugar and corn syrup over moderate heat, stirring, until smooth and pour into a 13- by 9- by 2-inch baking dish. Cut six 1-inch thick slices from center portion of bread, reserving ends for another use, and trim crusts. Arrange bread slices in one layer in baking dish, squeezing them slightly to fit.

In a bowl whisk together eggs, half-and-half, vanilla, Grand Marnier, and salt until combined well and pour evenly over bread. Chill bread mixture, covered, at least 8 hours and up to 1 day.

Preheat oven to 350° F and bring bread to room temperature.

Bake bread mixture, uncovered, in middle of oven until puffed and edges are pale golden, 35 to 40 minutes.

Serve hot French toast immediately.

(Ben likes his with a little bit of warm real maple syrup. Not the fake stuff. You know the goodness from a tree stuff).

Tuesday, June 23, 2009

4th of July Dress...

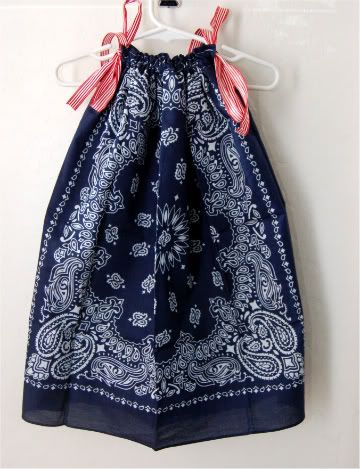
I love all you crafty bloggers out there. You have the most amazing ideas that I can use on my almost nonexistent budget. I was checking out Trey and Lucy and saw the cutest bandanna dress that gave me an idea for a 4th of July dress for Sydney. That day is Ben's birthday after all, so we try to dress for the occasion. Here's the one I made for Missy Moo, and it really did only take me about 15 minutes. Okay, maybe 23 or so but it was my first one...

I bought the bandanna's at Joanns for about $1.25 each. The ribbon, I [re]used from another project so the dress cost a whopping $2.50 to make! Woo Hoo!

Click here if you want a tutorial on how to make one

Photobucket

Tuesday, June 16, 2009

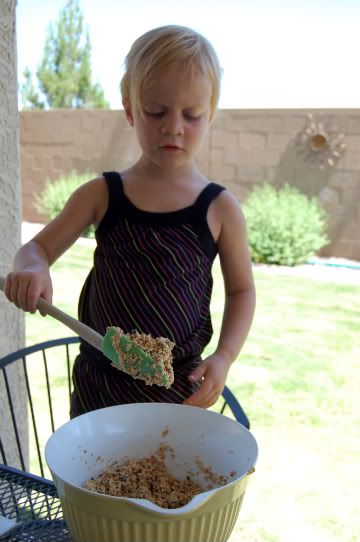
Birdseed cookies...

These were fun and easy and very kid friendly. Got the idea from
Let's Explore. Click on the link to get a little more info on the craft and what to do to make it go smoothly. So fun!

Here's the recipe:
Birdseed Cookies
  • 3/4 cup flour
  • 1/2 cup water
  • 3 Tablespoons corn syrup
  • 4 cups birdseed
Mix it all together.

Photobucket

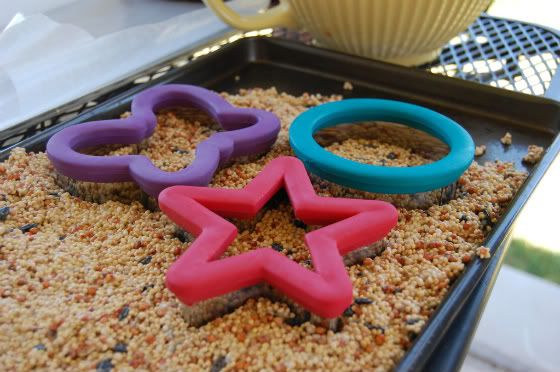
Pat it all out flat on a cookie sheet and cut with cookie cutters.

Photobucket

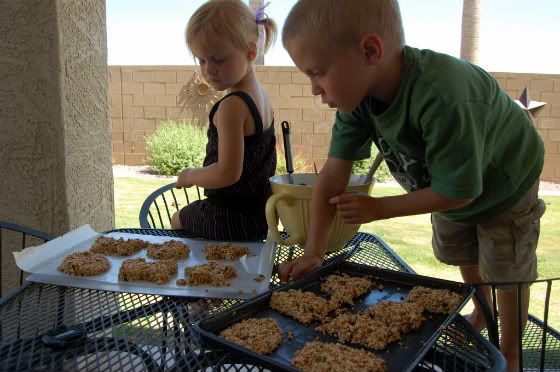
Transfer to another cookie sheet and let dry. To transfer the cookie, you might need to scoop the birdseed with the cookie cutter still around it for it to hold it's shape. Once it's transferred you can remove the cookie cutter and it should hold up fine.

Photobucket

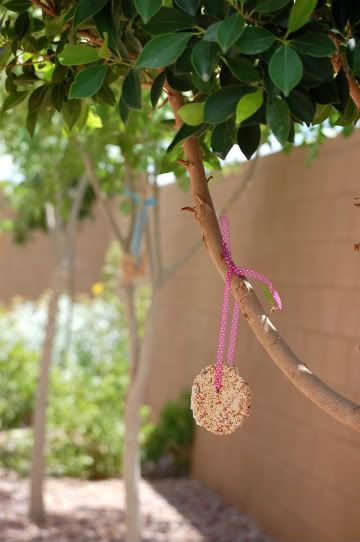
Make sure to poke holes in the top to put ribbon through. You could use a straw or a skewer for the whole.

Photobucket

Photobucket


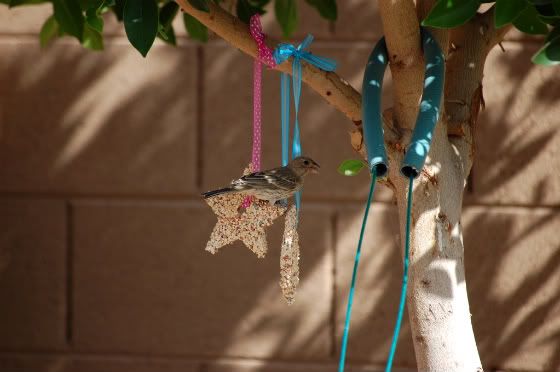
The kids have had fun looking at the cookies throughout the day to see how much has been eaten. It's also been fun to watch all the birds come into the yard.